

PSP Corel X8

Thank you very much for the translation
Pinuccia

Thank you very much for the translation
Pinuccia

Danke für die Deutsch Übersetzung Kniri
![]()
Nederlandse vertaling door Lisette Maggen.
Bedankt daarvoor
Thank you very much for the translation Englisch
Svc Design

Tube
Mary
LB Tubes
Crealine
Plugins
Effects - Filters Unlimited 2.0
Effects - Mehdi - Sorting Tiles
Effects- Flaming Pear – Flood
Alien Skin Eye Candy 5:Impact
Mask
Sahmaran(Aslı)
Deko
Hüzünlü Yıllar
Sahmaran- Aslı
Text
Sahmaran(Aslı)
Materials
Preparation
Foreground color to #FFFFFF
Background color to #000134
1.
File /New Open 900x600 Transparent Image

Layers - Duplicate
Effects - Filters Unlimited 2.0 -kang 1 - Shiva's Gate

Double click on this Layer and set the Blend Mode to ( Hard Light)
Effects - Mehdi - Sorting Tiles

Open Raster 1
Effects - Mehdi - Sorting Tiles

Layers - Merge - Merge Down

2.
Open - Deko- Hzünlü Yıllar Deco 1
Edit / Copy
activate your work
Edit / Paste - Paste As New Layer
Activate Pick Tool and  place it like this
place it like this
3.
Open - Deko- Hzünlü Yıllar Deco 2
Edit / Copy
activate your work
Edit / Paste - Paste As New Layer
Activate Pick Tool and place it like this
place it like this
4.
Open -Deko-Davina- Cadre
Edit / Copy
activate your work
Edit / Paste - Paste As New Layer
Activate Pick Tool and place it like this
place it like this
Layers - New Raster Layer
Selections -Load/ Save Selection-Sah Lisette Moon Light Sel 1
Open - Tube - Manzara
Edit / Copy
activate your work
Edit/ Paste - Paste Into Selection
Effects -3D Effects - Drop Shadow

Selections - Select None
Layers- Merge - Merge Down

Double click on this Layer and set the Blend Mode to( Luminance)
5.
Layers - Duplicate
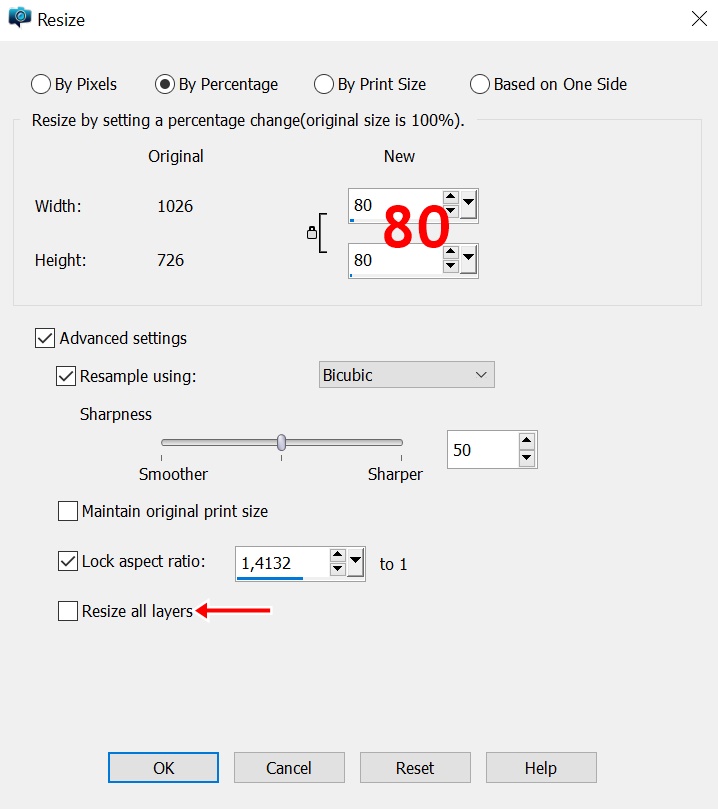
Image - Resize

Activate Pick Tool and place it like this
place it like this
6.
Layers - New Raster Layer
Flood Fill Background color to #000134
Open Sah Mask Lisette Moon Light
Layers - New Mask Layer - From Image
Double click on this Layer and set the Blend Mode to Dodge
(You can also do Luminance (Legacy) according to your work.)
Opacity 81
7.
Open- Text 1
Edit / Copy
activate your work
Edit / Paste - Paste As New Layer
Activate Pick Tool and place it like this
place it like this
Edit /Copy
activate your work
Edit / Paste - Paste As New Layer
Activate Pick Tool and place it like this
Activate Pick Tool and
place it like this
8.
Open - Tube- Mary 0812-70
Image - Resize

Edit /Copy
activate your work
Edit / Paste - Paste As New Layer
Activate Pick Tool and place it like this
Activate Pick Tool and
place it like this
Opacity 32
Image - Add Borders - Symmetric. 1 pixel, color #000134
Image - Add Borders - Symmetric. 1 pixel, color #ffffff
Image - Add Borders - Symmetric. 1 pixel, color #000134
Selections- Select All
Image - Add Borders - Symmetric.45pixel, color #ffffff
Effects - 3D Effects - Drop Shadow

Alien Skin Eye Candy 5:Impact -Perspective Shadow
Sah - Lisette Moon Light Angel - Perspective Shadow
Selections _ Select None
Image - Add Borders - Symmetric. 1 pixel, color #000134
10.
File - Open - Tube -Mary 222112 - 1 Png
Edit / Copy
activate your work
Edit / Paste - Paste As New Layer
Image - Resize
Activate Pick Toll and  place it like this
place it like this
Effects - 3D Effects - Drop Shadow

11.
File- Open - Deco - Sah -Lisette Moon Light Angel Deco
Edit / Copy
activate your work
Edit / Paste - Paste As New Layer
12.
File - Open - Text- Sah Lisette Moon Light Angel Text
Edit Copy
activate your work
Edit / Paste - Paste As New Layer
Activate Pick Toll and place it like this
place it like thisAlien Skin Eye Candy 5:Impact -Perspective Shadow
Drop Shadow , Blurry
Put Your Watermarkt
Image - Resize 900 Pixels
Save JPEG

Test Çalışması için Vahide Hocam'a Teşekkür ederim.
Thank you very much to the translators


Danke Schön Kniri

Bedankt Lisette


Gracias Tati Design


Thank you SVC-Design

Thank you very much to every one for these nice versions
Thank you Emma

Thank you Korry

Thank you Uschi

Thank you H.Marika


Thank you Cre@ Marley

Teşekkür ederim Aynur

Thank you Nelly


Teşekkür ederim Melodi


Thank you Nicole C

Teşekkür ederim Kamil Bey


Thank you Trudy


Thank you Martine

Thank You Liliana

Thank you Mamy Annick


Thank you Ria


Thank you Bastet

Thank you Szelike

Thank you Anne Marie

Thank you Elly

Thank you Talonaiguille

Thank you Lynnette

Thank you Pia

Thank you Erzsike

Thank you Biquinho


Thank you Gypsie

Thank you CleideM


Thank you Jewel


Hiç yorum yok:
Yorum Gönder